
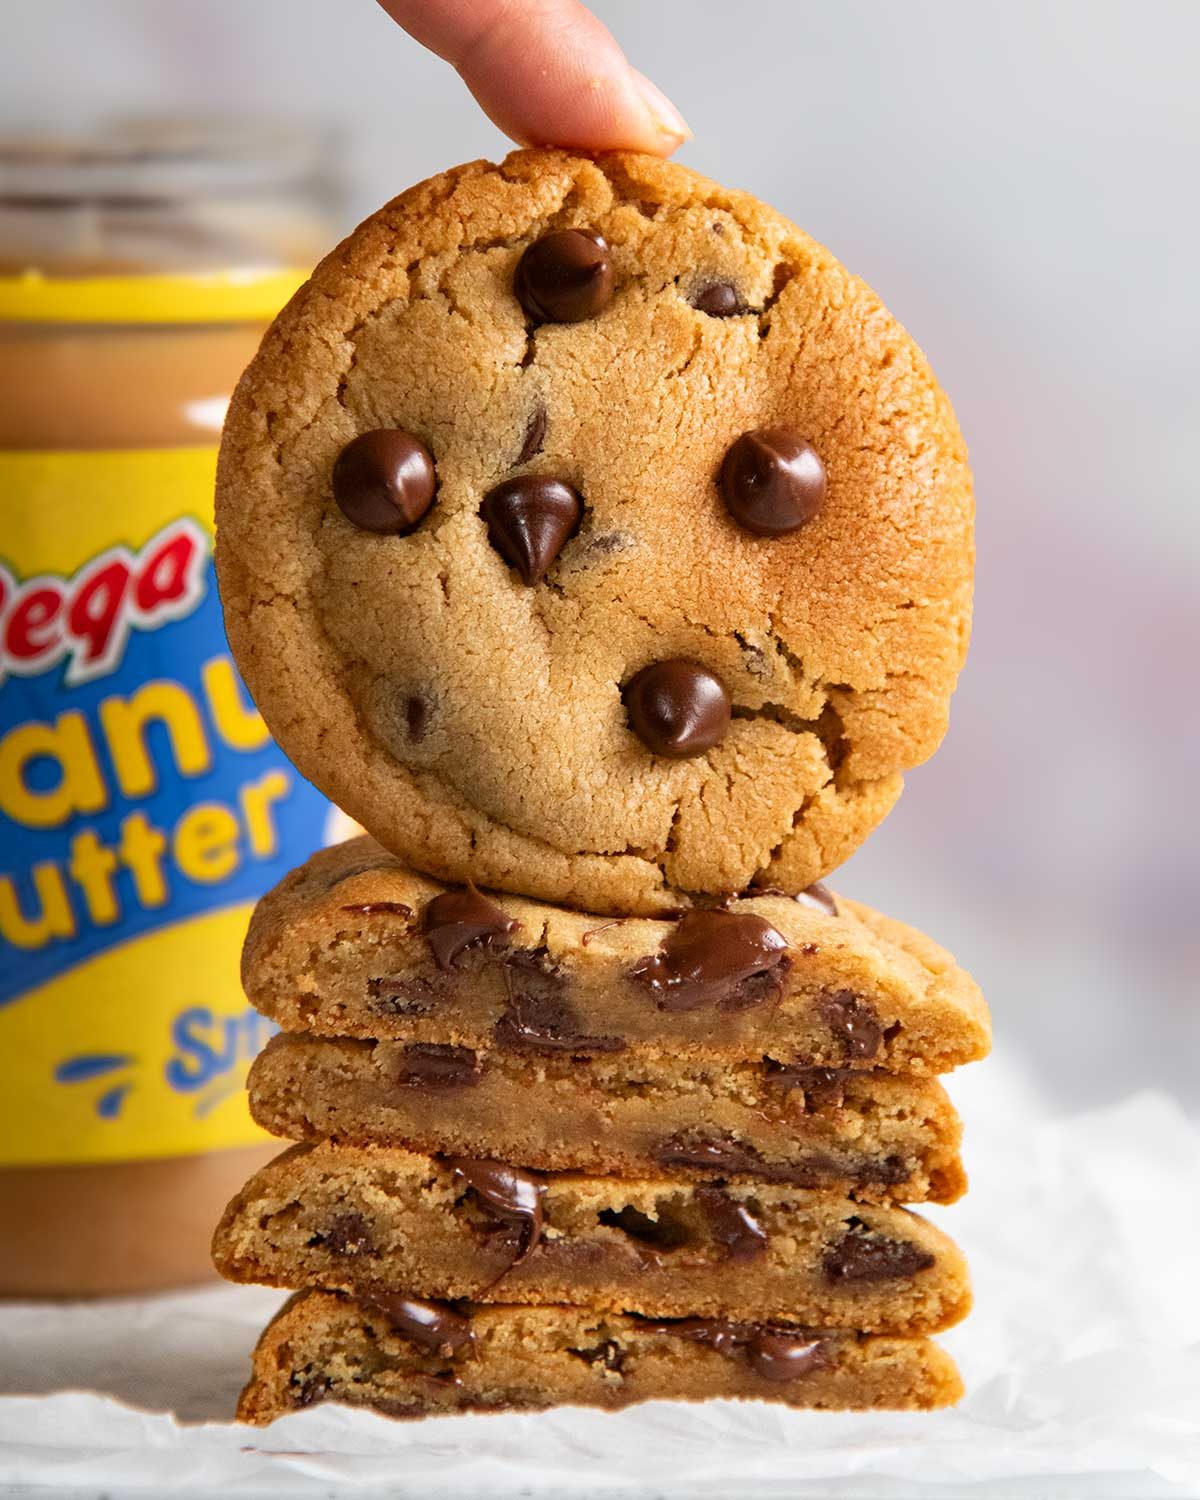
Choc Chip Peanut Butter Cookies. Chewy insides. Crispy edges. Peanut butter forward. And chocolate chips. Need I say more? (Fine. It’s also an easy hand mixed recipe!)
Choc Chip Peanut Butter Cookies
These peanut butter cookies are here for no other reason than because I felt like a peanut butter treat one weekend, and as happens all too often, my first attempt was fine but not what I was after. I wanted that all important cookie combination of golden and crisp at the edges, soft and chewy inside, with un-missable peanut butter flavour. A bakery-style cookie rather than the thinner style of the magic 3 Ingredient Peanut Butter Cookies.
And once I get an idea like that in my head, I get a little fixated and won’t stop tinkering until I get there. It took a few goes – but thankfully far less than the memorable 48 attempts for my ultimate Chocolate Chip Cookie.
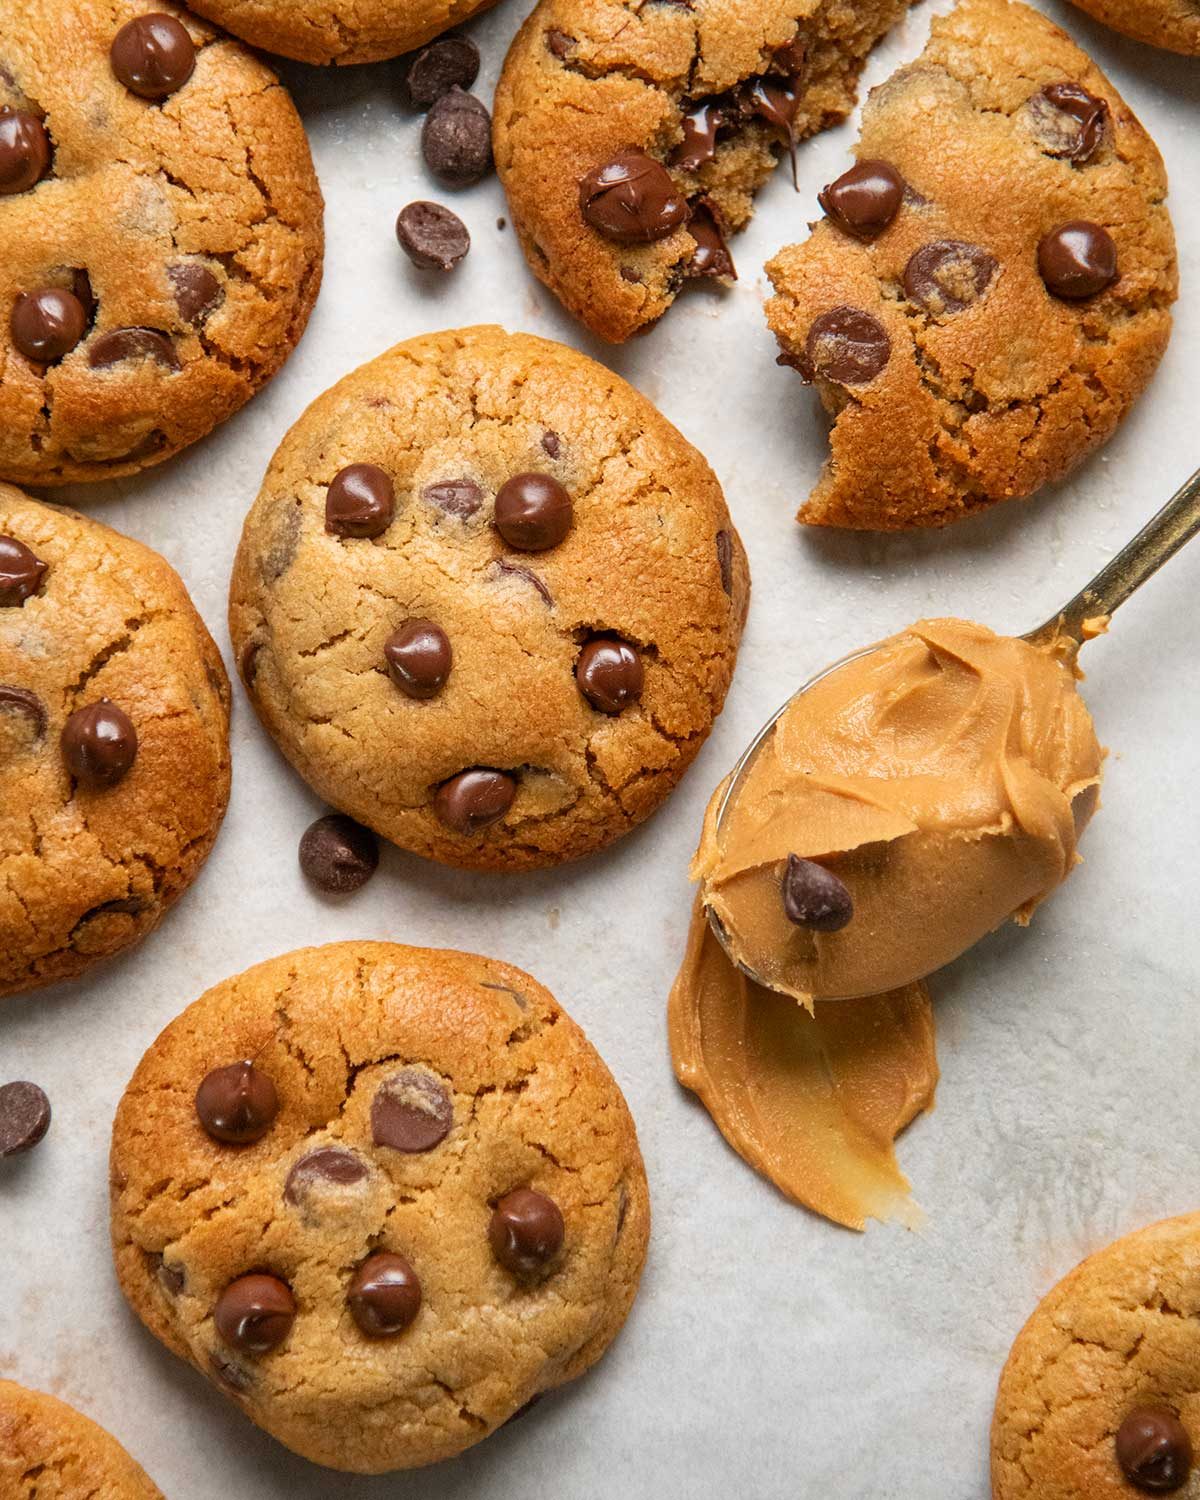
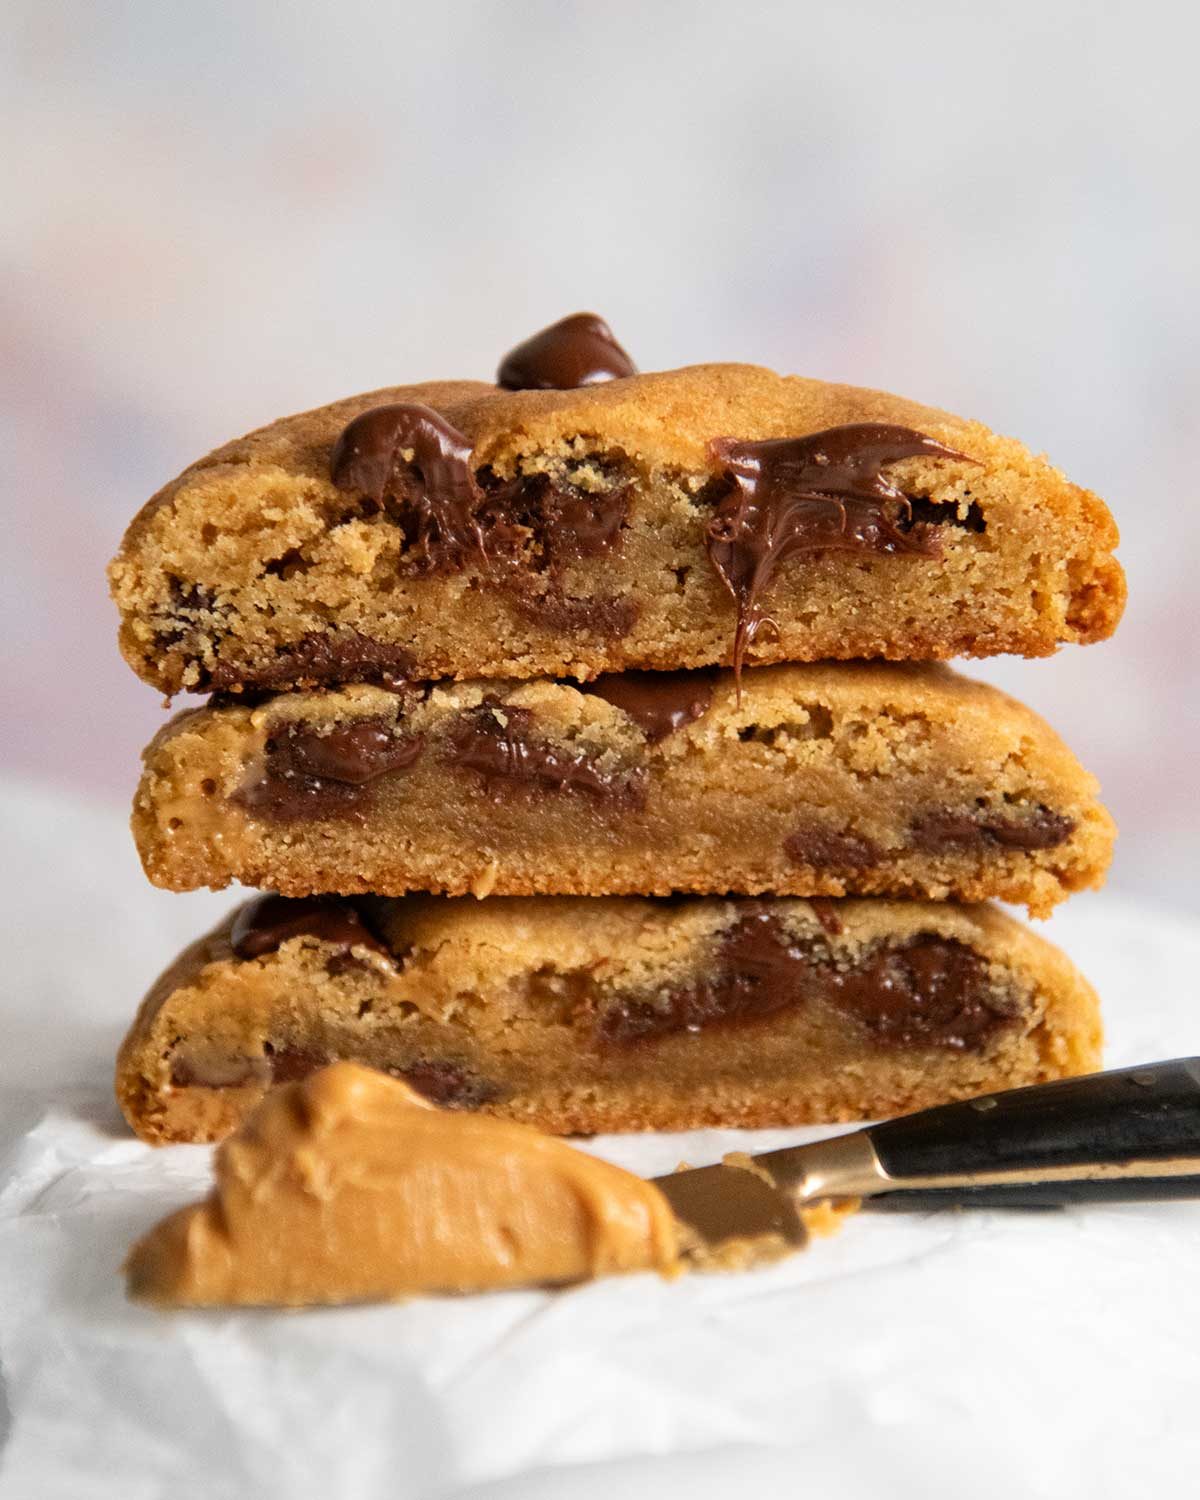
And somewhere along the way, chocolate chips got added and there was no going back. Though I must admit I added a little too much at first, to the point that it overtook the peanut butter flavour. So I dialled it back a bit, though as you can see, nobody would say this is stingy on the chocolate. See? 😅
What you need for Peanut Butter Cookies with Choc Chips
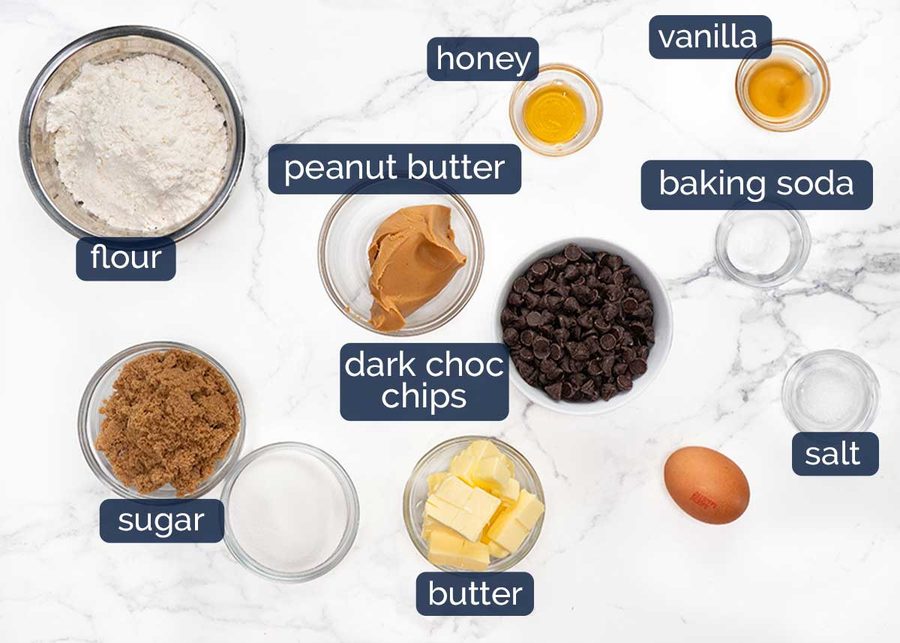
You need …… peanut butter. And choc chips! 😂 And that tiny bit of honey you see is a little bakers’ trick. It’s not for flavour. It helps the cookies turn sun-kissed golden in just 12 minutes, so the insides stay fudgy. Without it, they’re quite pale!
-
Peanut butter – This recipe calls for the commercial spread type of peanut butter like Bega (Australia), Jif and Skippy (US) and Sun-Pat (UK) which have sugar, salt and stabilisers added. Yup, all the nasties! Not the wholesome pure peanut butter which is made with 100% peanut butter – it’s much thinner and won’t work for this recipe as written.
I use smooth peanut butter but you can use crunchy if you want little peanut bits in your cookie.
-
Chocolate chips – I use dark chocolate chips, called semi-sweet chocolate chips in the US. You can use whatever type of chocolate chips you want, or even chop up a block.
-
Honey (bakers’ trick!) – Just 1 teaspoon works magic in these cookies! It makes the centres a little chewier (I felt early versions were slightly pasty from the peanut butter) and helps the cookies brown faster, so they come out beautifully golden without overcooking the inside.
-
Flour – Regular plain / all-purpose flour. Self raising flour won’t work here. Well, it will, but the cookie will come out drier and puffier, I think.
-
Baking soda (bicarbonate soda) – This makes the cookie rise a bit, and also spread. If you use baking powder instead using the standard conversion of 1:3, the cookies bake thicker and the inside is not as chewy, they are a bit more puffy.
-
Brown and white sugar – Brown sugar gives cookies caramely flavour and chew while the white sugar them crispy. Though not wildly sweet, these are sweet cookies so if you want to cut back on the sugar, you can reduce the white sugar down to 1/4 cup but the edges won’t be as crispy (I tried this especially). Any less, and you’ll start to affect the integrity of the dough.
-
Egg – A fridge cold large egg, from cartons labelled “large eggs” which are approximately 50-55g/2oz in the shell. Most baking recipes will call for eggs to be at room temperature, but there’s no need to do that here. In fact, a cold egg is better because it helps keep the cookie dough temperature down which means less fridge time. Which means – these cookies get in your belly faster!!
-
Unsalted butter, melted- The butter is melted so there’s no need to soften it like you often see in cookie recipes. But you do need to cut it into pieces so it melts evenly.
-
Salt – This brings out the flavours in the cookie, and peanut butter in particular loves salt. But we only need 1/4 teaspoon because the peanut butter we use has salt in it too.
-
Vanilla extract – Just to add a little bit more flavour into the cookie, complimenting rather than overwhelming the peanut butter flavour.

How to make Choc Chip Peanut Butter Cookies
This cookie dough requires 1 hour in the fridge before baking. I hate chilling cookie dough as much as anyone, but annoyingly, it really is necessary here – it firms up the dough so the cookies don’t spread into sad little pancakes in the oven. And before you ask, yes I did try to add a little extra flour to stiffen the dough to avoid the fridge time, but the inside of the cookie was drier than acceptable (in my world). So 1 hour fridge time it is!
-
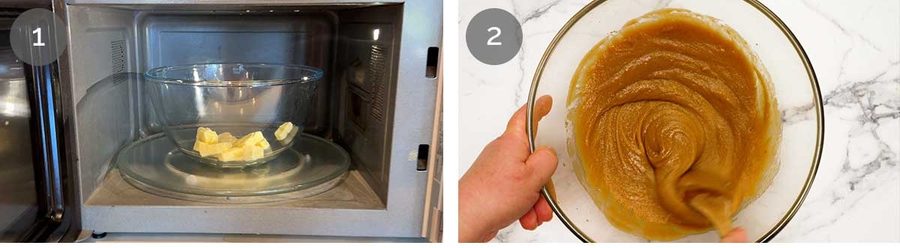
Barely melt butter – Put the butter in a heatproof bowl then microwave in increments until the butter is almost melted. Then finish melting by hand using a wooden spoon. This way, the butter won’t be too hot to move straight on with mixing the egg in without worrying about it scrambling! If you do accidentally melt the butter and it’s hot, just set aside for 5 minutes or so to cool to room temperature.
-
Wet ingredients first – Mix both the sugars in (still using the wooden spoon). Next, add the egg, honey, vanilla and salt and mix until combined. Then mix the peanut butter in until the mixture is smooth (though I don’t think anyone would complain about little peanut butter lumps in their cookie!).
-
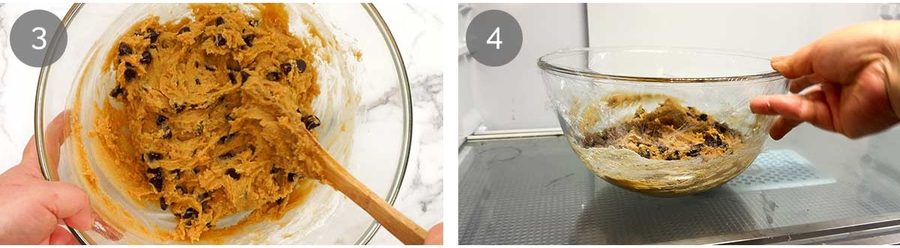
Dry next – Add the flour then scatter the baking soda across the surface. Mix until the flour is just about incorporated. Add the choc chips then mix again until you no longer see flour.
-
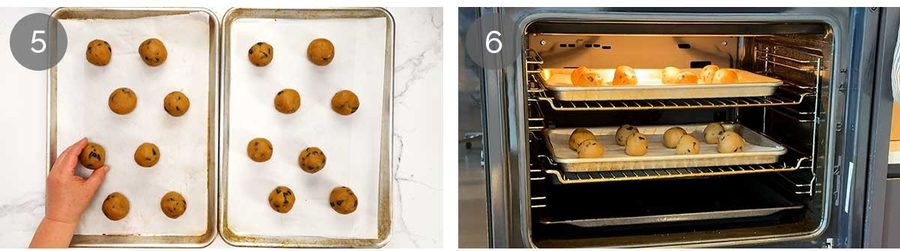
Fridge 1 hour – Cover the bowl and pop it in the fridge for 1 hour. This makes the dough firm up so it can be rolled into balls, and gives the flour time to hydrate so your cookies will be nice and chewy inside, and won’t taste like raw flour. Also, if you skip the fridge time, the cookies will spread too much.
Overnight fridge and freezing – You can keep the dough in the fridge for up to 2 days, or after the 1 hour fridge time, you can roll balls then freeze.
-
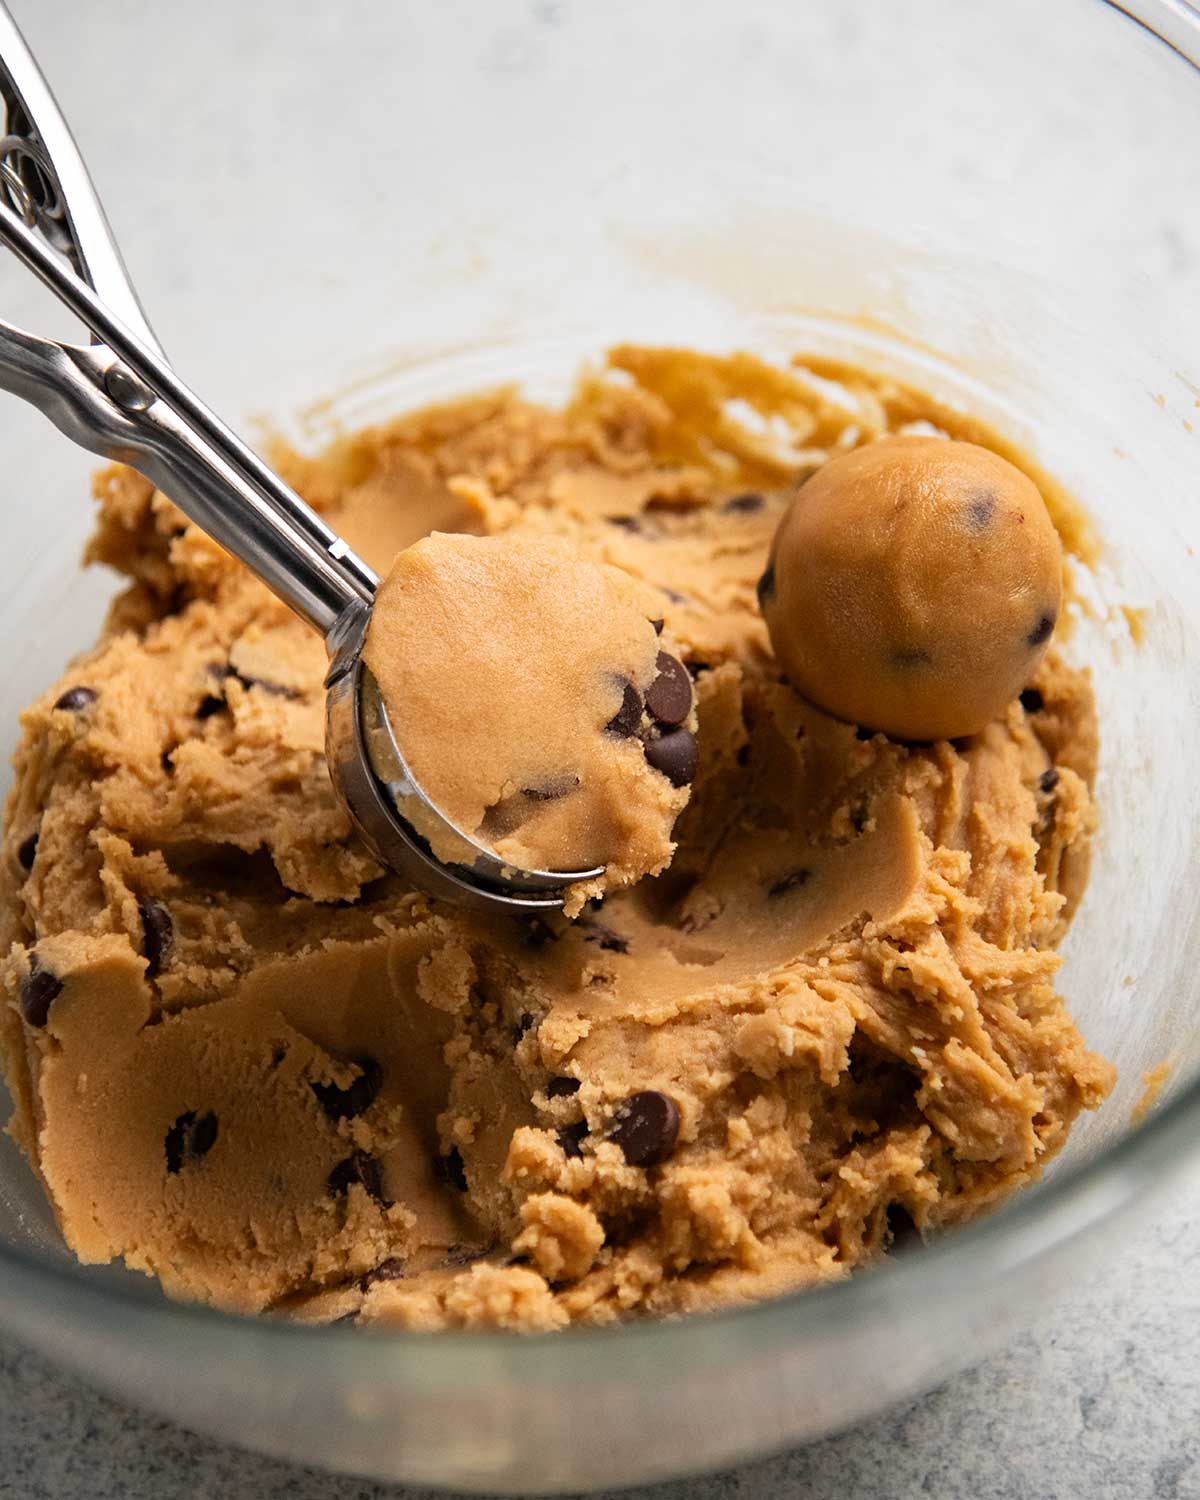
Roll the cookie dough into 16 balls using a size 24 cookie scoop (2 1/2 tablespoons).
-
Bake 12 minutes – Place the balls on 2 lined trays 6cm/2.5″ apart. Bake for 12 minutes at 190°C/375°F (170° fan-forced), until the edges are golden the middle of the surface is a lighter golden. (They will get a little darker during the cooling stage)
🎉 Good to know – The frozen cookie dough balls can be baked from frozen! Same oven temperature and time.
-
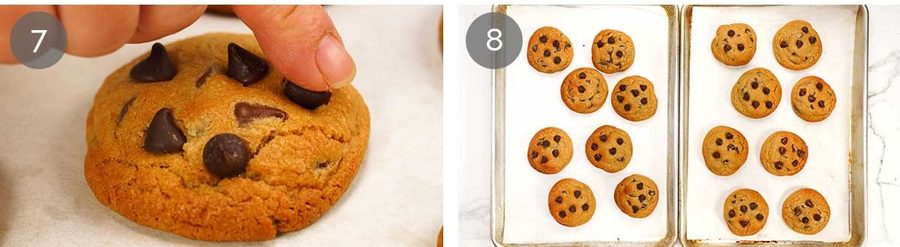
Press on choc chips – As soon as they come out of the oven while still hot, press the reserved chocolate chips on. The heat will make the chocolate melts so they stick on the cookie. I like to push some in a bit, on a slight angle (I think it looks nice, rather than having pointy choc chip studs all over the surface!).
-
Cool 10 minutes – Leave the cookies on the tray for 10 minutes before enjoying them. The residual heat will continue cooking the inside and the outside will become crisp so you can pick them up. But they will still be warm, with melty chocolate!
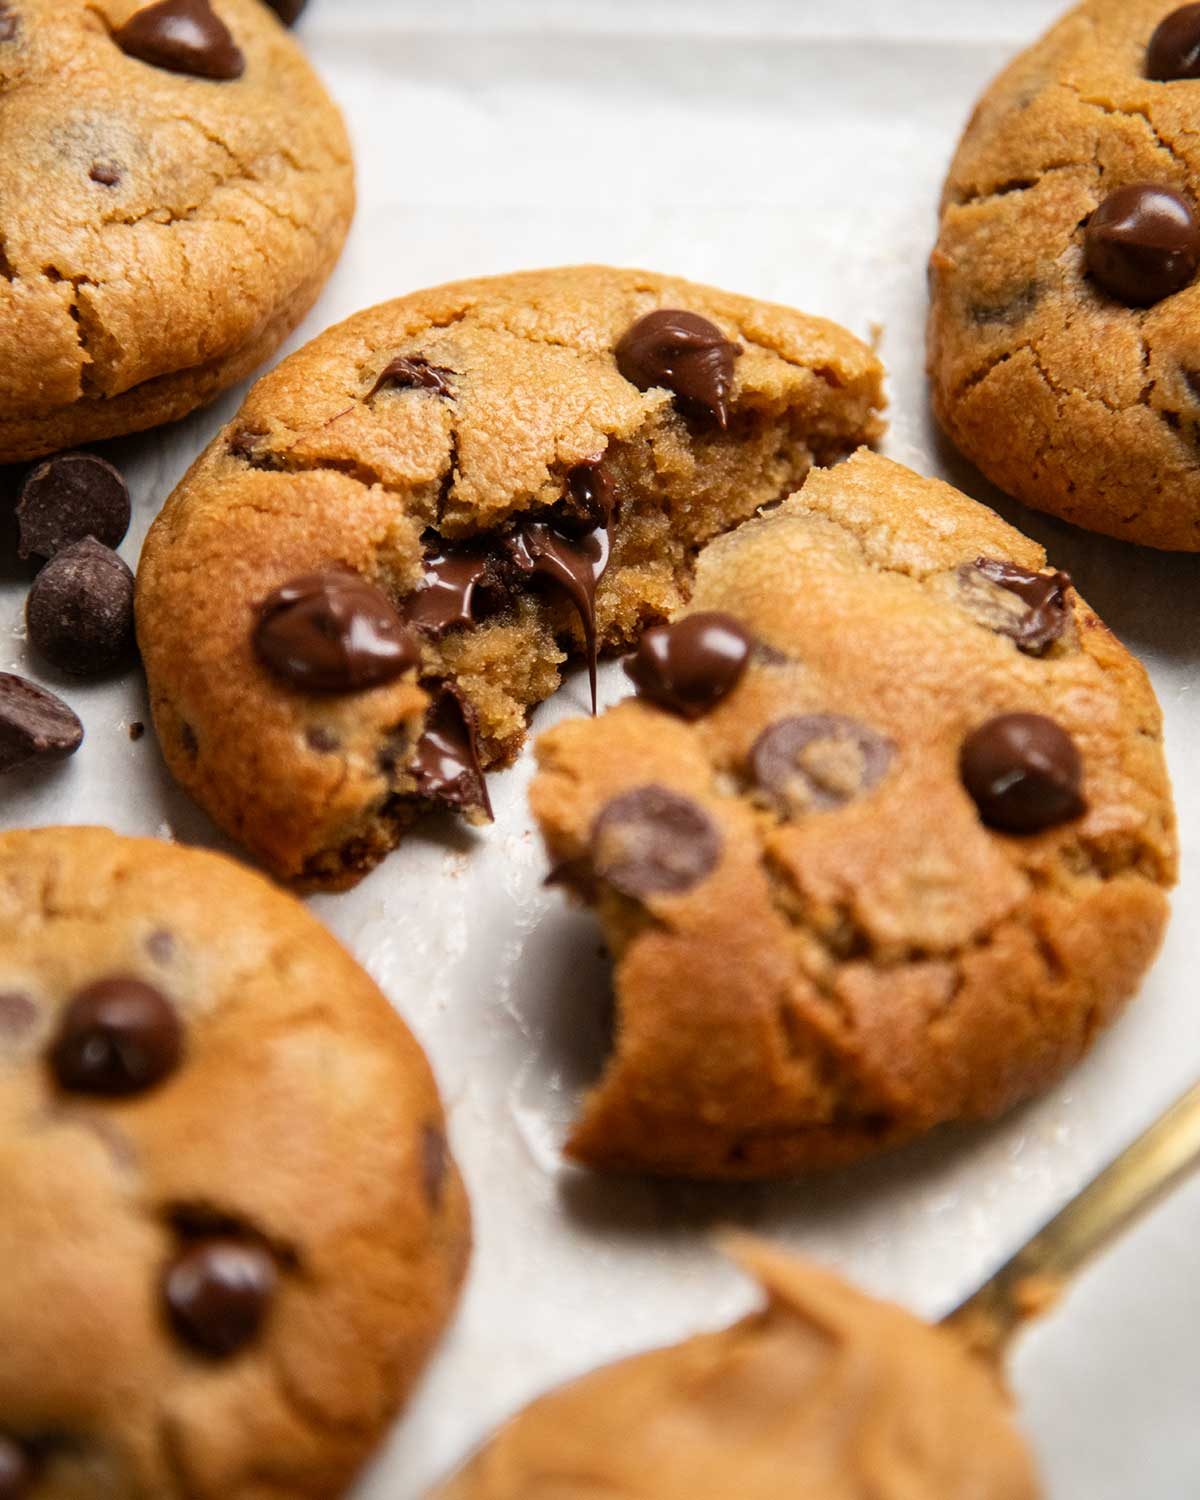
If they don’t disappear straight off the tray, transfer them to a cooling rack to finish cooling so the underside doesn’t sweat and soften. Then once fully cool, they can be stored in an airtight container – terrific for 3 days, still good for another 2 days.
Also, don’t miss the tip in the recipe card for how to freeze the cookie dough balls so you can bake on demand – from frozen. How good is that!! – Nagi x
FAQ
We have tried this with White Wings Gluten-Free flour (Australian brand) and it was terrific. The colour and texture was the same – crispy outsides, soft inside – though they were a little thicker and therefore smaller rounds. To make them spread more, reduce the flour by a touch – I think 2 tablespoons would do it.
Note: Gluten-free flour blends vary a lot between brands, so I can only vouch for White Wings. However, the fact that it worked so well gives me confidence other good gluten-free flour blends should work too, though the texture and spread may vary slightly.
I haven’t tried, but I should think that spreads with a similar spread should work, like Biscoff. Nutella should work too, but I am not sure it would add enough Nutella flavour in this. But it won’t work with runny natural spreads, like pure natural peanut butter with no sugar, salt or stabilisers added.
YES YOU DO! I really tried to avoid it, and tried numerous versions, but couldn’t – not for this recipe. Peanut butter changes the structure of the dough, it makes the inside of the cookie pasty if you use too much flour. But less flour = softer dough = spreads into sad pancakes in the oven. Fridge time = flour hydrates + butter firms up = firmer cookie dough = spreads just right.
Make the recipe as written, including the 1 hour fridge time. Roll the cookie dough balls then freeze in very airtight containers or in ziplock bags (press all the air out). Bake from frozen – same oven temp and time per recipe. They come out a little bit thicker than the cookies pictured which is in no way a bad thing!
Note: if you are baking less than 8 per tray, check them first at the 10 mark as they will bake faster.
Watch how to make it
Hungry for more? Subscribe to my newsletter and follow along on Facebook, Pinterest and Instagram for all of the latest updates.
Choc chip Peanut Butter Cookies
Prep: 15 minutes
Cook: 12 minutes
Cookie dough fridge time and cookie cooling: 1 hour 10 minutes
Total: 1 hour 37 minutes
Sweet Baking
Western
Servings16 cookies 8cm/3.2″ wide, 1.5cm / 0.6″ thick
Tap or hover to scale
Prevent screen from sleeping
Instructions
ABBREVIATED RECIPE
-
Melt butter, mix in sugars, then mix in egg, vanilla, salt and honey. Mix in peanut butter until smooth, then the flour and baking soda, and lastly the choc chips. Fridge 1 hr, roll into 16 balls, bake 12 min at 190°C/375°F (170°C fan), cool 10 min on trays. Don’t forget extra choc chips for surface!
FULL RECIPE
-
Set aside ~2 1/2 tablespoons of chocolate chips to decorate the surface.
-
Barely melt butter – Put the butter in a microwave proof bowl and microwave in 20 second increments on high until almost melted. Then mix with a wooden spoon to finish melting using residual heat.
-
Make cookie dough – Stir in both the sugars. Then add the egg, vanilla, honey and salt. Stir until combined. Add the peanut butter and stir until smooth (a few little lumps is ok – I don’t think anyone would complain!)
-
Add dry ingredients – Add the flour then scatter the baking soda across the surface. Mix until the flour is mostly incorporated. Then add most of the choc chips (reserve enough to decorate at the end) and mix until you no longer see flour.
-
Fridge 1 hour – Cover with cling wrap and refrigerate for 1 hour, or up to 2 days. (Note 2)
-
Preheat oven to 190°C/375°F (170°C fan-forced). Line 2 trays with baking paper (parchment paper).
-
Roll the dough into 4cm / 1.6″ balls, you should get 15 – 16 (size 24 cookie scoop, 1 1/2 tbsp). Place on baking paper / parchment paper lined trays, 6 cm / 2.5″ apart. Bake for 12 minutes until golden around the edges and lighter golden on the surface.
-
Top, cool, attack! As soon they come out of the oven, press chocolate chips gently onto the surface (I like to push some in a tiny bit, on a slight angle). Cool on the tray for 10 minutes so they finish cooking and the edges crisp up. Then attack! Or transfer to cooling racks and fully cool before storing in airtight containers.
Recipe Notes:
2. Baking powder will work but changes the shape and texture of the cookie, it will be thicker (so won’t spread as much) and a bit less chewy inside. Use 2 1/2 teaspoons.
3. Refrigerating cookie dough – Dough can be kept in the bowl for 2 days in the fridge. The cookie gets even better – inside slightly chewier, edges and base crispier, and colour more golden. But while some cookies like my best Chocolate Chip Cookie is designed for overnight refrigeration, this peanut butter cookie is intentionally made to be great with just a 1 hour.
Note: Dough becomes hard if kept in fridge for longer than 3 hrs, leave out on counter for ~1 hr until soft enough to scoop and roll balls. You can also freeze the cookie dough balls – bake from frozen for time per recipe.
4. Gluten-free – Substitute the flour with gluten-free flour, follow recipe as written. I used White Wings GF flour (I’m in Australia), common brand carried at regular grocery stores. They didn’t spread as much and came out a little thicker but flavour and texture were spot on! See FAQ for more info.
Storage – Cookies will keep in an airtight container for 3 to 4 days, in the pantry.
Nutrition per cookie, assuming 16 cookies.
Nutrition Information:
Calories: 233cal (12%)Carbohydrates: 27g (9%)Protein: 4g (8%)Fat: 13g (20%)Saturated Fat: 6g (38%)Polyunsaturated Fat: 1gMonounsaturated Fat: 4gTrans Fat: 0.2gCholesterol: 24mg (8%)Sodium: 76mg (3%)Potassium: 120mg (3%)Fiber: 1g (4%)Sugar: 17g (19%)Vitamin A: 176IU (4%)Vitamin C: 0.003mgCalcium: 19mg (2%)Iron: 1mg (6%)
Life of Jaffle
They say you shouldn’t compare siblings because every child has their own unique talents. This week, I was reminded why. Jaffle’s brother and sister, Taggart and Beatrice, went to the Golden Retriever National competition in South Australia last week and took out first and second place!

Meanwhile, Jaffle, it would seem, did not inherit the show dog gene. He spends a lot of time doing this….

….his idea of adoring me is doing this…..

…I spend a lot of time doing this…. (taking rubbish out of his mouth. Seriously. I think I do it a thousand times a day.)

But this photo! I love it. You can totally see he’s from champion stock – look at him prancing around like he’s in a show ring!! (Well, minus the toilet roll in his mouth 🧻🚽)